Jump to:
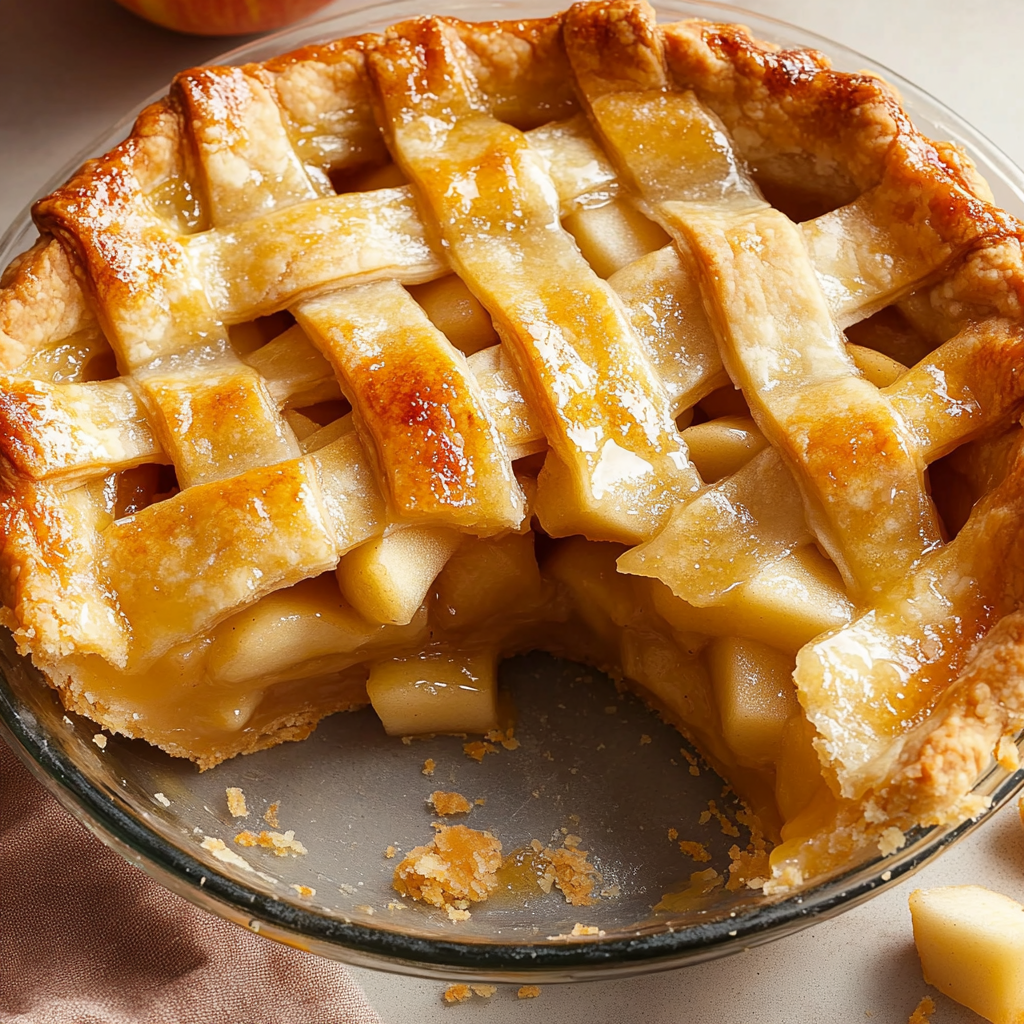
Irresistible Classic Apple Pie Recipe with Buttery Homemade Apple Pie Crust
There’s nothing quite like the aroma of a fresh Homemade Apple Pie Crust baking in the oven. This classic dessert combines the perfect balance of sweet, tender apples with a buttery, flaky crust that melts in your mouth. Creating your own homemade apple pie crust from scratch might seem intimidating at first, but with the right technique, you’ll master this timeless skill and elevate your baking game. This recipe will guide you through creating a pie that’s sure to become a family favorite for generations.
Why You'll Love This Recipe
- This homemade apple pie crust achieves the perfect balance of flakiness and tenderness that store-bought versions simply can’t match
- The buttery flavor develops beautifully during baking, creating a rich foundation that complements the sweet-tart apple filling
- Making your own crust allows you to control the ingredients, avoiding preservatives and artificial flavors found in pre-made options
- The process is surprisingly forgiving, even for beginners, and the techniques you’ll learn transfer to countless other pie recipes
- Nothing beats the pride and satisfaction of serving a completely from-scratch apple pie that showcases your baking skills
Why This Homemade Apple Pie Crust Recipe Works
The secret to this exceptional homemade apple pie crust lies in its perfect ratio of fat to flour. Cold butter creates those desirable flaky layers as it melts during baking, leaving behind little pockets of air. The careful balance of ingredients ensures the crust remains sturdy enough to hold your filling while still achieving that melt-in-your-mouth texture.
Unlike many recipes, this one incorporates a touch of acid from lemon juice, which helps prevent gluten development and keeps your crust tender. The brief resting period allows the gluten to relax and the flour to fully hydrate, making the dough easier to roll and preventing shrinkage during baking.
The egg wash finish provides that beautiful golden-brown color and slight shine that makes your pie look professionally crafted. And the addition of sanding sugar creates a delightful crunch that contrasts beautifully with the soft filling. This perfect pie crust recipe has been tested countless times to ensure consistent results for bakers of all skill levels.
What You’ll Need for Perfect Homemade Apple Pie Crust
Ingredients
- 2 (9″) pie crusts (homemade or store-bought)
- 7 large Granny Smith apples (peeled, cored and sliced into ½ inch slices)
- ½ cup granulated sugar
- ½ cup light brown sugar (loosely packed)
- 2 tablespoons all-purpose flour
- 1 teaspoon ground cinnamon
- ⅛ teaspoon ground nutmeg
- 1 tablespoon lemon juice (plus the zest of half a lemon)
- 1 large egg (lightly beaten in a small bowl for egg wash)
- 2 tablespoons sanding sugar (optional)
Tools
- Deep dish 9-inch pie plate
- Rolling pin
- Large mixing bowl
- Pastry brush (for egg wash)
- Sharp knife or pastry wheel
- Pie shield or aluminum foil
- Baking sheet
- Measuring cups and spoons
- Apple peeler and corer (optional but helpful)
- Pastry cutter or food processor (if making homemade crust)
How to Make Irresistible Classic Apple Pie with Homemade Apple Pie Crust
- Start by preparing a flaky pie crust recipe which makes 2 (9″) pie crusts, one for the bottom and one for the top of the pie. The pie dough will need to chill for at least 1 hour before rolling out. Alternatively, use a store-bought pie crust and follow package directions.
- Place oven rack in the center position and preheat the oven to 400°F (204°C).
- In a large bowl, combine the sliced apples, granulated sugar, light brown sugar, flour, cinnamon, nutmeg, lemon juice and lemon zest; toss to coat evenly.
- Remove the pie crust dough from the fridge and let rest at room temperature for 5-10 minutes. On a lightly floured surface, roll one disc into a 12″ circle that is ⅛” thick. Carefully lay the crust into the bottom of a deep dish pie plate.
- Spoon the apple filling over the bottom crust and discard juices at the bottom of the bowl. Roll out the second disc of pie crust until it is ⅛” thick and lay it over the apple filling.
- Use a sharp knife to trim the dough along the outside edge of the pie plate. Lift the edges where the two pie crusts meet, gently press to seal and fold them under. Rotate the pie plate and repeat this process until edges are neatly tucked under themselves.
- Cut 4 slits in the top of the dough to allow steam to vent. Place the pie on a baking sheet.
- Brush the surface of the pie crust with the egg wash and sprinkle with sanding sugar. Cover the edges with a pie shield or a strip of foil to keep them from over-browning during the first 25 minutes.
- Bake at 400°F (204°C) for 25 minutes. Carefully remove the pie shield, turn the oven down to 375°F and continue to bake for an additional 30-35 minutes or until the top is golden brown and the juices are bubbly.
- Cool at room temperature for at least 3 hours before serving to allow the filling to set properly.
For more detailed instructions on creating the perfect pie dough, check out this easy pie dough recipe that breaks down the science behind a flawless crust.
Chef's Helpful Tips
- Keep your butter COLD at all times – refrigerate it between steps if needed, as cold butter creates those desirable flaky layers in your crust
- Use a mixture of apple varieties for complex flavor – while Granny Smith provides tartness and structure, adding a few Honeycrisp or Braeburn apples introduces sweetness and depth
- Let your dough rest in the refrigerator for at least an hour before rolling – this relaxes the gluten and prevents shrinkage during baking
- Slice your apples uniformly (about ½ inch thick) to ensure they cook evenly throughout the pie
- Place a baking sheet under your pie while baking to catch any potential overflow, saving you from oven cleanup later
Serving and Storage Tips for Your Homemade Apple Pie Crust Creation
Allow your freshly baked pie to cool completely for at least 3 hours before slicing. This crucial resting period allows the filling to set properly and prevents a runny mess when you cut into it. The flavors also continue to develop during this time, resulting in a more delicious final product.
Serving Tips
For the ultimate experience, slightly warm individual slices in a 300°F oven for 5-10 minutes before serving. This reactivates the buttery aromas and makes the crust extra delightful. Serve with a scoop of vanilla ice cream or a dollop of freshly whipped cream for a classic pairing that never disappoints.
For a special touch, drizzle a bit of caramel sauce over the top or dust with a sprinkle of cinnamon. Your homemade apple pie will be the perfect centerpiece for any dinner party, holiday gathering, or weeknight treat. It pairs wonderfully with coffee, tea, or even a glass of dessert wine for adults.
Store any leftover pie loosely covered at room temperature for up to 2 days, or refrigerate for up to 5 days. To freeze, wrap individual slices tightly in plastic wrap and aluminum foil, then freeze for up to 3 months. Thaw overnight in the refrigerator before reheating.
Looking for something to serve before dessert? Try this Ultimate Chicken Casserole for a comforting main dish that will complement your pie perfectly.
Mistakes to Avoid while making Homemade Apple Pie Crust
Even experienced bakers can fall prey to common pie crust pitfalls. Avoid these mistakes to ensure your homemade apple pie crust turns out perfectly every time:
Overworking the dough is perhaps the most common error. This develops too much gluten, resulting in a tough, chewy crust instead of a flaky one. Mix ingredients just until they come together, and handle the dough as little as possible.
Using warm ingredients is another critical mistake. Butter should be cold and even your flour can benefit from a brief chill in the freezer. Warm fats blend too thoroughly with flour, preventing those distinct layers from forming.
Skipping the rest period leads to shrinkage and tough texture. Always allow your dough to rest in the refrigerator for at least an hour before rolling. This relaxes the gluten and allows the flour to fully hydrate.
Rolling the dough too thin can cause tearing and burning, while rolling it too thick results in an underbaked, doughy crust. Aim for about ⅛ inch thickness for the perfect balance.
Forgetting to vent your top crust prevents steam from escaping, leading to a soggy bottom crust. Always cut slits or decorative patterns in your top crust to allow proper ventilation during baking.
You Must Know
- The temperature of your ingredients matters tremendously – cold butter, ice water, and even chilled flour will produce a flakier crust by preventing the fat from fully incorporating into the flour
- Overfilling your pie can lead to disaster – stick to the recommended amount of filling to prevent bubbling over and soggy crusts (about 6-7 cups of fruit for a 9-inch pie)
- The type of fat you use dramatically affects texture – all-butter crusts have the best flavor but can be less forgiving, while a combination of butter and shortening offers flavor and reliability
- Proper cooling is non-negotiable – cutting into a hot pie will result in a runny filling that hasn’t had time to set, so always allow at least 3 hours of cooling time

Suggestions for Enhancing Your Homemade Apple Pie Crust
Once you’ve mastered the basic homemade apple pie crust, consider these enhancements to make it truly exceptional:
Add a tablespoon of apple cider vinegar to your crust for extra tenderness without affecting flavor. The acid helps prevent gluten development, resulting in an even flakier texture.
Replace a portion of the water with vodka, which inhibits gluten formation but evaporates during baking, leaving no taste behind. This creates an ultra-flaky crust that’s easier to work with.
Experiment with decorative edges by crimping, fluting, or braiding the crust. You can also cut the top crust into lattice strips or use small cookie cutters to create decorative vents that add visual appeal.
Add flavor to your crust with spices like cinnamon, nutmeg, or cardamom mixed directly into the dough. For a sweeter crust, add a tablespoon of sugar. For a savory note, try adding a pinch of black pepper or fresh herbs.
Brush the bottom crust with a thin layer of egg white before adding filling to create a moisture barrier that helps prevent sogginess. For extra insurance against a soggy bottom, sprinkle a tablespoon of crushed graham crackers or cookies over the bottom crust before adding filling.
If you enjoy experimenting with desserts, you might also like this 5-Ingredient Easy Keto Cloud Cake Recipe for something completely different!
FAQs:
Tough pie crust typically results from overworking the dough, which develops too much gluten. Handle the dough minimally, mix just until ingredients come together, and keep everything cold. Also, make sure you’re allowing the dough to rest in the refrigerator before rolling, which relaxes the gluten and results in a more tender crust.
Absolutely! You can prepare pie dough up to 3 days in advance and store it wrapped tightly in the refrigerator. For longer storage, freeze the dough for up to 3 months. You can even roll out the dough, place it in your pie plate, and freeze the whole thing (wrapped well) until you’re ready to fill and bake. This is a great time-saver for holidays.
Butter provides the best flavor, while shortening offers reliability and texture. Many bakers prefer a combination—typically 70% butter for flavor and 30% shortening for structure. All-butter crusts have superior taste but require more skill to work with, as butter has a narrow temperature window where it’s malleable but still cold enough to create flaky layers.
Shrinkage happens when the gluten in the dough contracts during baking. To prevent this, don’t stretch the dough when placing it in the pie plate, allow the dough to rest in the refrigerator for at least 30 minutes before baking, and use pie weights when blind baking. Overworking the dough also contributes to shrinkage, so handle it gently and minimally.
Several techniques help prevent soggy bottoms: brush the bottom crust with beaten egg white before adding filling, sprinkle a tablespoon of flour or crushed cookies on the bottom crust, partially blind bake the bottom crust, use a metal or glass pie plate (which conducts heat better than ceramic), place the pie on a preheated baking sheet or the lowest oven rack, and make sure your filling isn’t too wet by draining excess juices.
Conclusion: Mastering the Art of Homemade Apple Pie Crust
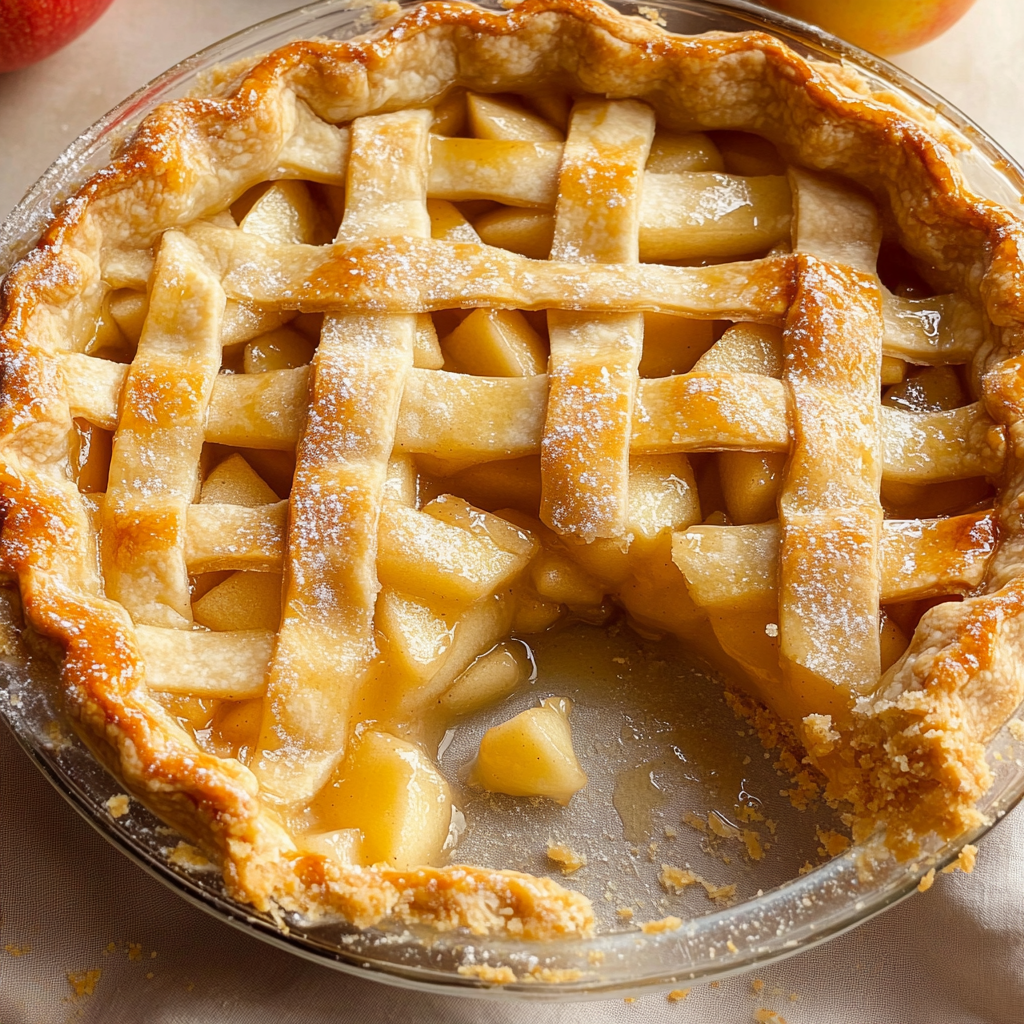
Creating a truly exceptional homemade apple pie crust is both an art and a science. With practice and attention to detail, you’ll develop an intuitive feel for the dough and create consistently beautiful results. The time and effort invested in making your crust from scratch elevates a simple dessert into something truly special that friends and family will remember.
The perfect balance of flaky, buttery crust with sweet-tart apple filling creates a dessert that’s greater than the sum of its parts. By following these techniques and avoiding common pitfalls, you’ll be well on your way to pie-making perfection. Remember that even “imperfect” homemade pies are delicious and have a rustic charm all their own.
For more baking inspiration, check out this homemade apple pie recipe with additional variations, or explore our 10-Minute Creamy Garlic Shrimp Pasta for a quick and delicious dinner before dessert. Happy baking!
More Easy Dinner Recipes:
- Chicken Onigiri Recipe: Perfect Japanese Rice Balls Made Easy
- Best Seafood Lasagna Layers Recipe – Easy & Delicious
- Easy Chicken Cordon Bleu Casserole For Weeknight Delights
- Creamy Pumpkin Pasta Sauce: Perfect Fall Recipe Ready
Recommended


📖 Recipe Card

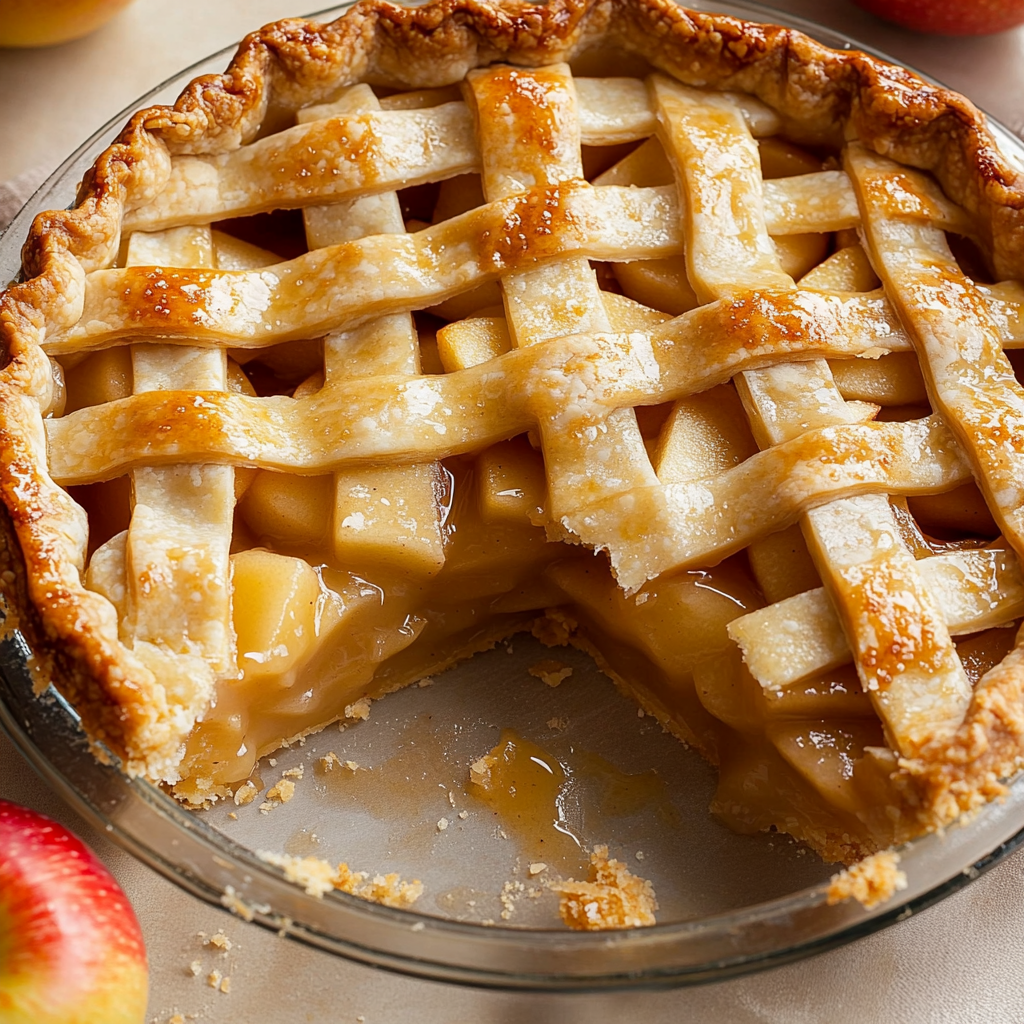
Classic Apple Pie with Buttery Homemade Crust
- Total Time: 3 hours 40 minutes (including cooling)
- Yield: 1 pie (8 servings) 1x
Description
This timeless apple pie recipe features a flaky, buttery homemade crust filled with tender spiced apples. With just the right balance of tartness and sweetness, and a hint of cinnamon, this classic dessert is perfect for any occasion. Learn how to master the pie dough from scratch and bake a pie that’s both rustic and impressive.
Ingredients
- 2 (9″) pie crusts (homemade or store-bought)
- 7 large Granny Smith apples (peeled, cored, sliced into ½ inch slices)
- ½ cup granulated sugar
- ½ cup light brown sugar (loosely packed)
- 2 tbsp all-purpose flour
- 1 tsp ground cinnamon
- ⅛ tsp ground nutmeg
- 1 tbsp lemon juice
- Zest of ½ lemon
- 1 large egg (lightly beaten, for egg wash)
- 2 tbsp sanding sugar (optional)
Instructions
- Preheat oven to 400°F (204°C).
- Prepare pie crust; chill dough for at least 1 hour.
- Toss sliced apples with sugars, flour, spices, lemon juice, and zest.
- Roll out bottom crust and place in 9″ deep dish pie plate.
- Add apple filling, discarding excess juice.
- Roll out top crust, cover pie, trim edges, seal and tuck under.
- Cut 4 slits in the top for steam to escape.
- Brush with egg wash, sprinkle with sanding sugar.
- Cover edges with foil; bake 25 mins at 400°F.
- Remove foil, reduce heat to 375°F; bake 30–35 more mins until golden.
- Cool for 3 hours before slicing.
Notes
- Use cold butter and chilled ingredients for best crust results.
- Granny Smith apples are ideal for structure, but mixing varieties adds complexity.
- Prevent a soggy bottom by brushing crust with egg white or dusting with crushed graham crackers.
- Pie can be made ahead; freezes well.
- Prep Time: 40 minutes
- Cook Time: 60 minutes
- Category: Dessert
- Method: Baking
- Cuisine: American
Nutrition
- Serving Size: 1 slice (1/8 pie)
- Calories: 420
- Sugar: 32g
- Sodium: 180mg
- Fat: 21g
- Saturated Fat: 13g
- Unsaturated Fat: 7g
- Trans Fat: 0g
- Carbohydrates: 58g
- Fiber: 4g
- Protein: 3g
- Cholesterol: 45g
Keywords: apple pie, homemade pie crust, classic apple dessert, granny smith pie, flaky butter crust, from scratch pie, holiday pie, all-butter pie crust, traditional apple pie, double crust pie